4090 gpu를 사용하는 window11 환경에서
cuda 11.1 버전을 설치하겠습니다
저랑 비슷한 환경인 경우 시도해 보시면 좋을 것 같습니다
stylegan3를 사용하기 위해서는 python 3.8, pytorch 1.9.0(이상버전), cuda tookit 11.1(이상버전) 이 필요하기에
저는 제 컴퓨터와 맞는 cuda 11.1과 cudnn 8.1.1로 설치하였습니다
1. CUDA 설치
먼저는 밑에 링크에 들어가셔서 cuda 11.1을 설치해 줍니다
https://developer.nvidia.com/cuda-11.1.0-download-archive
CUDA Toolkit 11.1.0
Get CUDA Toolkit 11.1.0 for Linux and Windows.
developer.nvidia.com
window11 버전은 따로 없지만 window10 버전으로 다운로드하시면 됩니다

2. CUDNN 설치
그다음은 cudnn 8.1.1을 설치하겠습니다
밑에 링크로 들어가서 cudnn v8.1.1 cuda 11.0,11.1 and 11.2를 클릭하셔서 다운로드하여 주세요
https://developer.nvidia.com/rdp/cudnn-archive
cuDNN Archive
Download releases from the GPU-accelerated primitive library for deep neural networks.
developer.nvidia.com

다운로드하시면 압축을 풀고
C:\Program Files\NVIDIA GPU Computing Toolkit\CUDA\v11.1
해당 경로에 덮어주시면 됩니다

혹시나 잘 설치되었는지 확인하시고 싶으시면
윈도우 검색창에 ' 시스템 환경 변수 편집 ' 을 검색해서 실행시켜 주신 다음
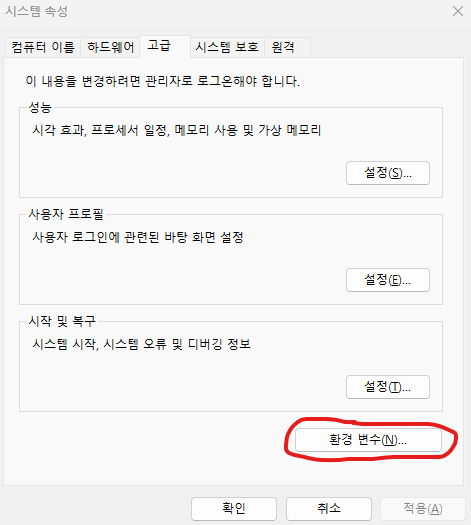
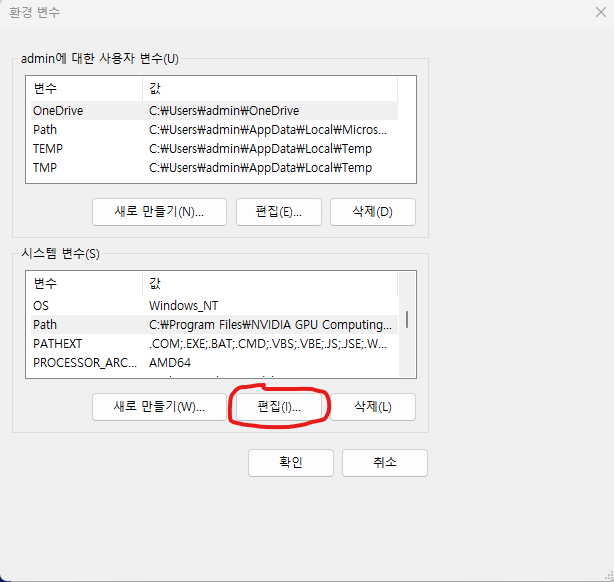
고급 → 환경 변수 → 시스템 변수에서 Path를 클릭해 주신 다음 편집을 눌러주시면
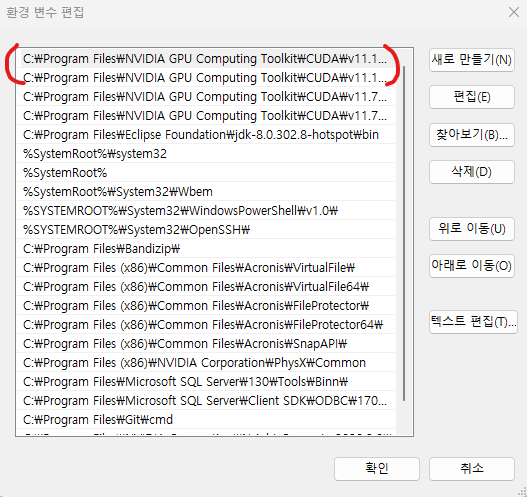
위에 처럼 CUDA가 잘 설치되어 있다고 확인할 수 있습니다
혹시 git이 설치되어 있지 않으신 분들은 밑에 링크로 들어가셔서 click here to download 로 설치해 주세요
https://git-scm.com/download/win
Git - Downloading Package
Download for Windows Click here to download the latest (2.40.1) 32-bit version of Git for Windows. This is the most recent maintained build. It was released 22 days ago, on 2023-04-25. Other Git for Windows downloads Standalone Installer 32-bit Git for Win
git-scm.com
3. Stylegan3 설치
이제 Stylegan3를 설치해 보도록 하겠습니다
아래 링크로 들어갑니다
https://github.com/NVlabs/stylegan3
GitHub - NVlabs/stylegan3: Official PyTorch implementation of StyleGAN3
Official PyTorch implementation of StyleGAN3. Contribute to NVlabs/stylegan3 development by creating an account on GitHub.
github.com
- <>code 아이콘 클릭 후 밑에 보이는 링크를 복사해 줍니다

- Anaconda Prompt를 실행
- 저는 제가 작업할 폴더(workspace)를 새로 하나 만들고 시작하겠습니다 제가 작업할 폴더의 경로로 들어갑니다
cd workspace
- git clone으로 stylegan3 폴더를 설치해 주고 stylegan3 경로로 들어갑니다
git clone https://github.com/NVlabs/stylegan3.git
cd stylegan3
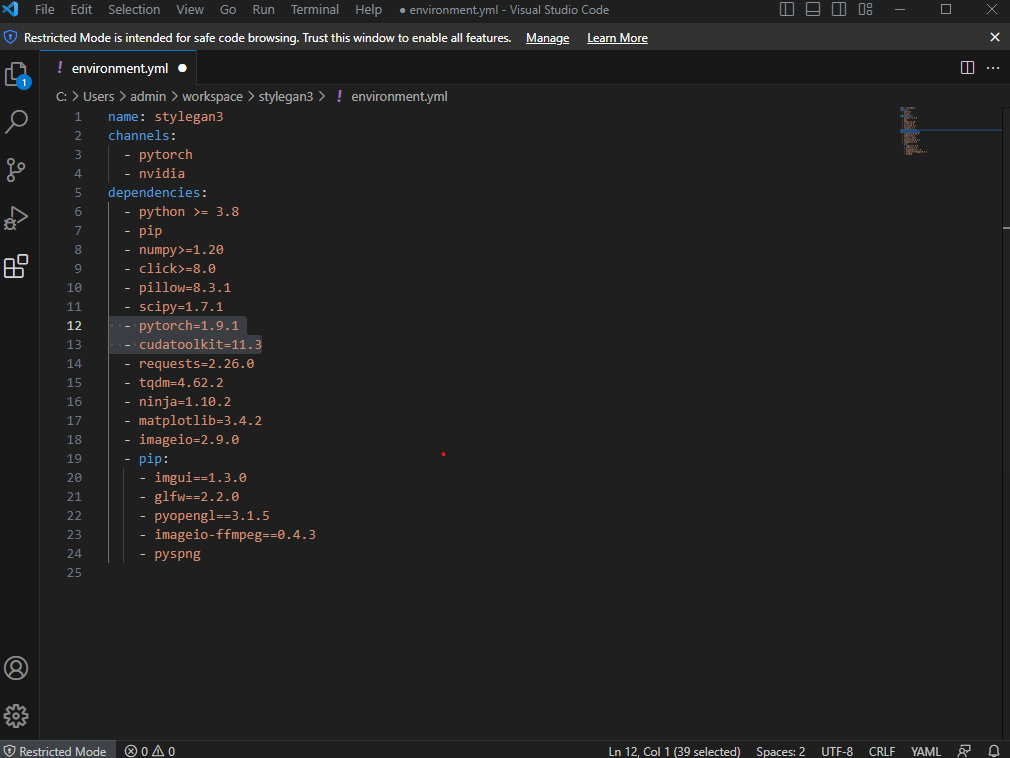
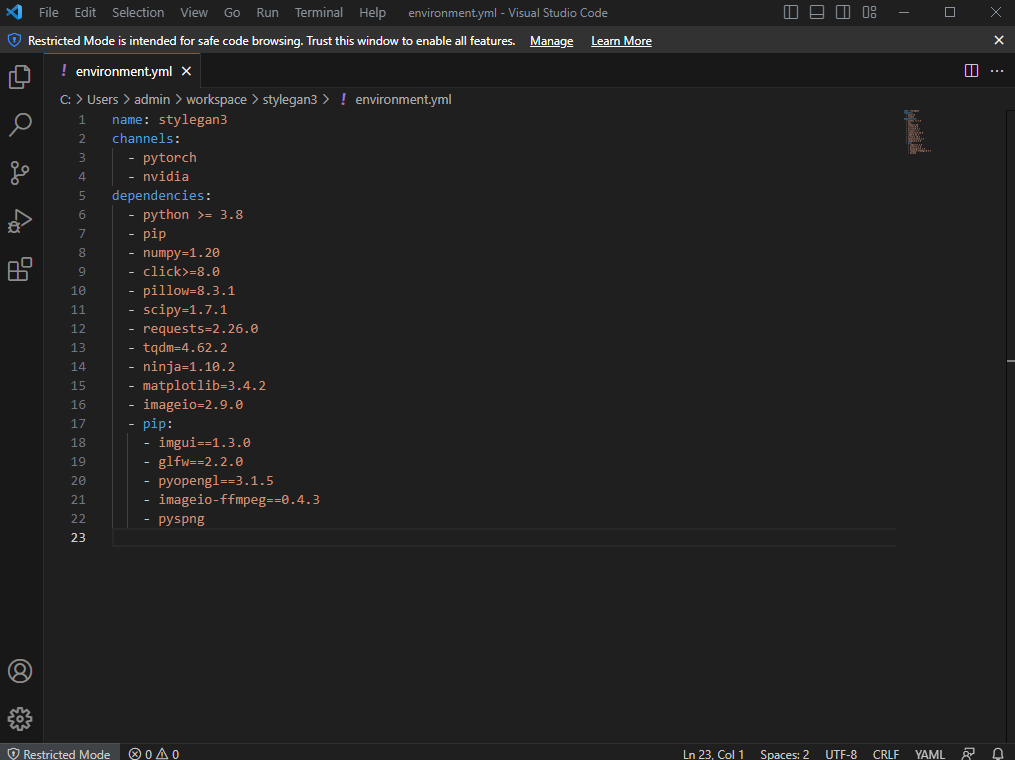
- stylegan3를 사용할 가상환경을 만들어 줍니다 다행히 폴더 안에 environment.yml 파일을 보면 가상환경과 패키지들을 쉽게 설치할 수 있도록 되어 있어서 그대로 설치하겠습니다
- 그전에 제 컴퓨터에 설치된 CUDA 버전에 맞게 environment.yml을 수정하겠습니다
- pytorch와 cudatoolkit을 지워 주고 numpy>=1.20을 numpy=1.20으로 변경해 주세요
- 가상 환경과 패키지들을 설치해 줍니다
conda env create -f environment.yml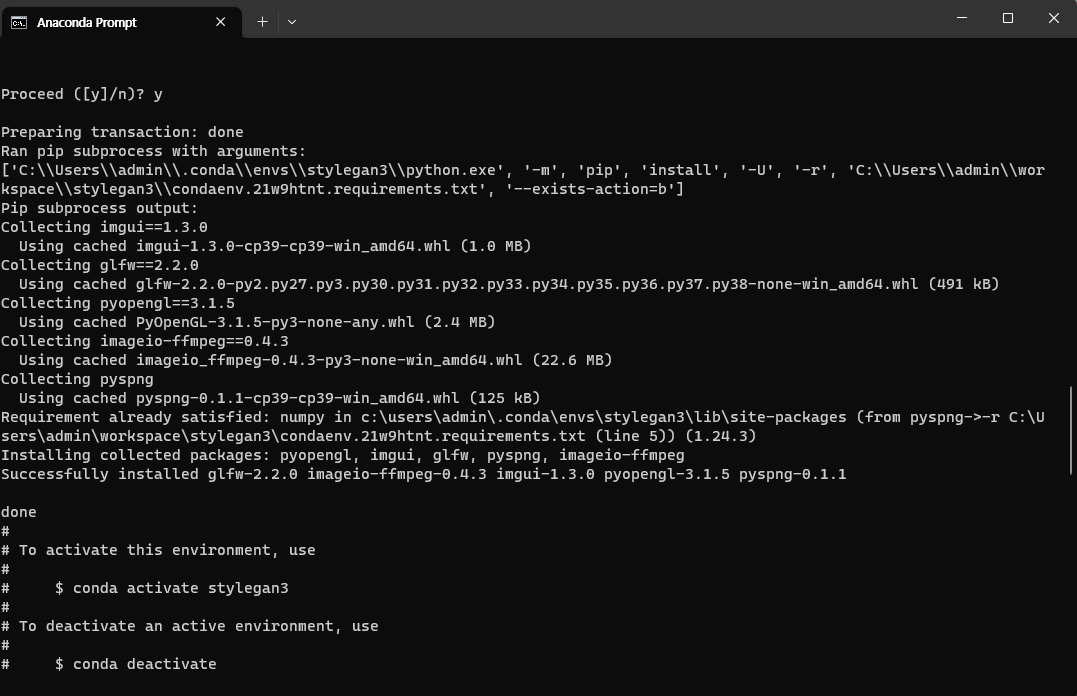
- 위 사진처럼 화면에 나왔으면 설치가 완료 되었습니다 이제 가상환경에 접속합니다
conda activate stylegan3
- 이제 가상환경에서 pytorch를 설치합니다
- 아래 링크로 들어가서
https://pytorch.org/get-started/previous-versions/
PyTorch
An open source machine learning framework that accelerates the path from research prototyping to production deployment.
pytorch.org

- CUDA 11.1 버전에 맞는 pytorch를 설치해 줍니다
pip install torch==1.9.1+cu111 torchvision==0.10.1+cu111 torchaudio==0.9.1 -f https://download.pytorch.org/whl/torch_stable.html
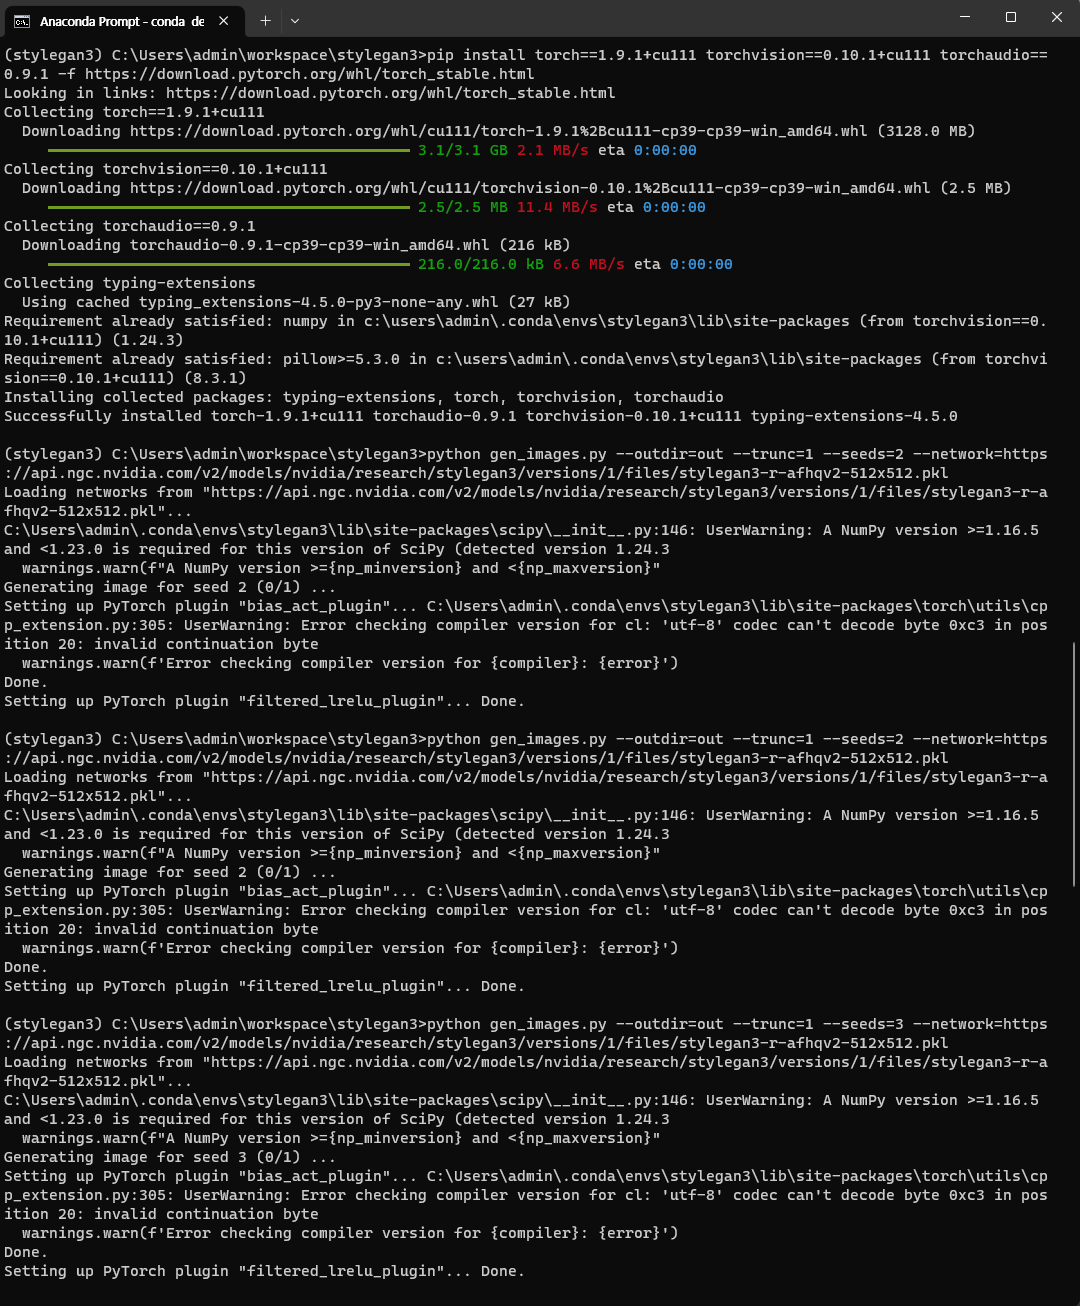
3. Stylegan3 테스트
- 이렇게 stylegan3 설치는 완료되었습니다 이제 정말 설치가 잘 되었는지 확인하기 위해 깃허브에 있는 예제를 테스트해 보겠습니다
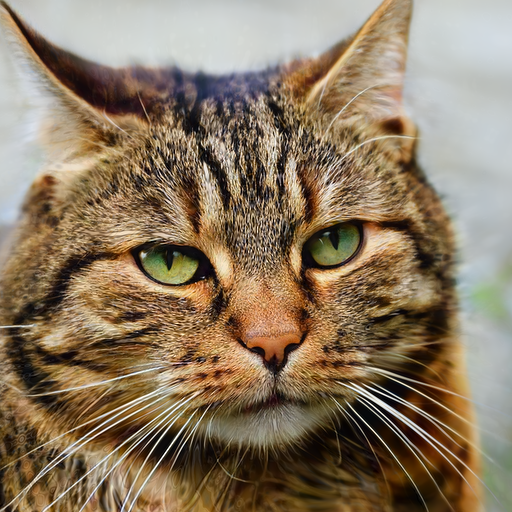
python gen_images.py --outdir=out --trunc=1 --seeds=2 --network=https://api.ngc.nvidia.com/v2/models/nvidia/research/stylegan3/versions/1/files/stylegan3-r-afhqv2-512x512.pkl
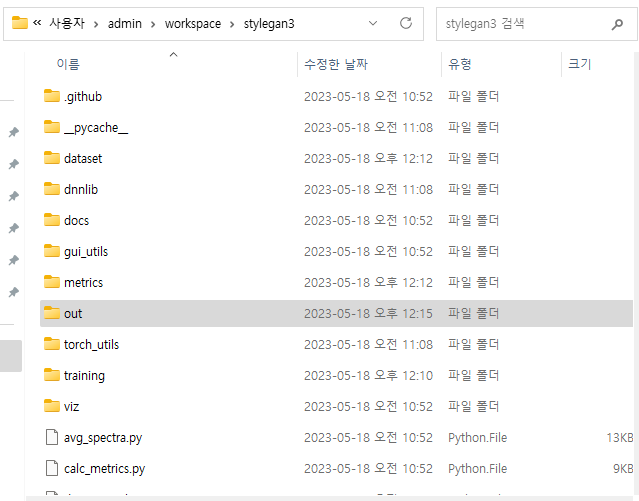
- stylegan3 폴더 안 out 폴더를 들어가 보셔서 이렇게 이미지가 생성 되었다면 완료입니다

이것으로 stylegan3 window 설치를 마치도록 하겠습니다
stylegan3 사용하시는 분들에게 도움이 되었으면 좋겠네요
다음에는 stylegan3에 있는 모델을 활용해서 이미지 데이터를 증대하는 예제를 진행해보려고 합니다
감사합니다.